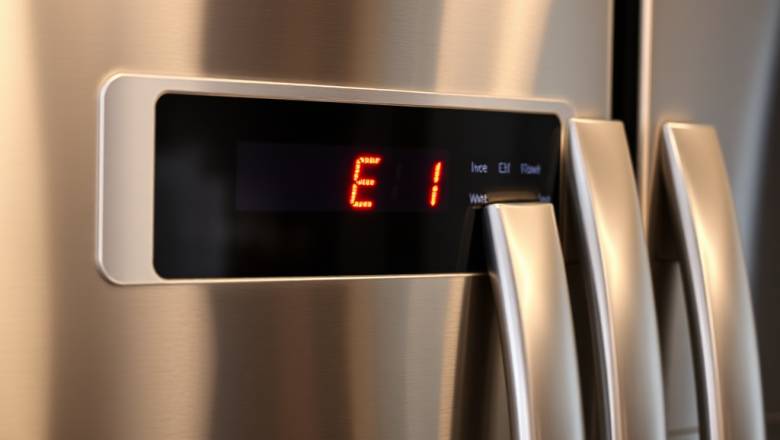
Whirlpool Refrigerator E1 Error — Causes and Step-by-Step Fix

The Whirlpool refrigerator E1 error code means the defrost temperature sensor (thermistor) has failed or is reporting out-of-range readings to the control board. According to Whirlpool's product support documentation, E1 indicates the sensor circuit is open, shorted, or sending resistance values that don't correspond to any real temperature. In approximately 40% of cases, the defrost thermistor itself has reached end-of-life and needs replacement — a $15–30 part that takes 30–45 minutes to install. Address E1 within 24–48 hours to prevent ice buildup on evaporator coils that leads to cooling failure.
The Whirlpool refrigerator E1 error code means the control board detected a defrost temperature sensor (thermistor) fault — the sensor is either sending readings outside its programmed range, has an open circuit, or is shorted. The defrost sensor monitors evaporator coil temperature to determine when a defrost cycle should begin and end. Without accurate readings from this sensor, the refrigerator cannot manage its defrost cycle properly, leading to ice buildup, temperature fluctuations, and potential food safety issues.
DIY fix success rate: approximately 70% of E1 errors resolved without a technician. Most common fix: replacing the defrost thermistor sensor (40% of cases, $15–35 part cost, 30–45 minute repair). Average professional repair cost: $150–$300. Critical timeframe: address E1 within 24–48 hours to prevent excessive ice buildup on evaporator coils that can cascade into additional cooling failures.
Whirlpool uses several error code formats depending on the model generation — E1, F1, and combinations like F3 E1 all relate to sensor faults, but each points to a different sensor location. This guide covers the E1 code specifically (defrost sensor fault) on Whirlpool French door, side-by-side, and top-freezer refrigerators, with diagnostic steps, multimeter readings, and exact replacement parts for common models. 154
What Does the E1 Error Code Mean on a Whirlpool Refrigerator?
E1 is Whirlpool’s diagnostic code for a defrost sensor circuit fault. The defrost sensor (also called the defrost thermistor or defrost bi-metal) is a small temperature-sensing component attached to or near the evaporator coils in the freezer section. Its job is critical: it tells the control board when the evaporator coils are cold enough to start accumulating frost, when to initiate a defrost heater cycle, and when the coils have reached a warm enough temperature to confirm the defrost is complete.
When this sensor fails or its wiring is compromised, the control board loses its ability to manage the defrost cycle. The board registers E1 because it’s receiving electrical readings (resistance values) that fall outside the expected range for any plausible temperature — either infinite resistance (open circuit, as if the sensor were disconnected), zero resistance (short circuit), or a value that doesn’t correspond to any real temperature.
How E1 differs from other Whirlpool refrigerator codes:
- E1 — Defrost sensor/thermistor fault (this guide). Affects defrost cycle management.
- E2 — Freezer air thermistor fault. Different sensor that monitors the actual freezer compartment air temperature.
- E3 — Refrigerator (fresh food) thermistor fault. Monitors the fridge section temperature.
- E5 — Humidity sensor or dispenser sensor fault.
- E6 — Ambient (room) temperature sensor error.
- Sy EF — Evaporator fan not running (motor or wiring issue, not a sensor).
- Sy CF — Condenser fan not running.
How to access error codes on Whirlpool refrigerators:
On many Whirlpool models, error codes are not automatically displayed. To enter diagnostic mode, press the door alarm/temperature alert button 3 times within 10 seconds while the refrigerator door is open. The display will cycle through stored error codes. Refer to your model’s use and care guide for the exact button combination, as it varies between French door, side-by-side, and top-freezer models. 155
Common Causes of the Whirlpool Refrigerator E1 Error
Based on Whirlpool’s technical service documentation and appliance repair data:
1. Failed defrost thermistor (approximately 40% of cases)
The defrost thermistor is a Negative Temperature Coefficient (NTC) resistor — its electrical resistance decreases as temperature increases. After 5–10 years of thermal cycling (freezing and thawing every 8–12 hours during defrost), the semiconductor material degrades. The sensor begins reporting resistance values that don’t match its actual temperature environment, or develops an internal open/short circuit. This is the natural end-of-life failure mode for NTC thermistors in refrigerator environments.
2. Ice buildup encasing the sensor (approximately 25% of cases)
If a previous defrost cycle failed to complete properly (due to a weak defrost heater, failed defrost timer, or door left ajar causing excess humidity), ice accumulates on the evaporator coils and can encase the defrost sensor in a thick block of ice. The ice insulates the sensor from actual coil temperature, causing it to report temperatures that don’t change as expected during defrost — the control board interprets this as a sensor fault. In this case, the sensor itself may be perfectly healthy; the ice is the problem.
Diagnostic clue: If E1 appeared after you noticed the freezer running warmer than usual or heard reduced airflow from the freezer vents, ice buildup on the evaporator is the likely root cause. Frost blocking the evaporator coils reduces cooling capacity before the sensor fault triggers E1.
3. Damaged or corroded wiring harness (approximately 15% of cases)
The wiring harness connecting the defrost sensor to the control board runs through the refrigerator frame, often passing through the hinge area (especially on French door models). This wire is subject to repeated flexing every time the door opens and closes. Over years, the wire fatigues and breaks internally (appearing intact externally) or the connector pins corrode from moisture exposure. A broken wire presents as an open circuit to the control board — indistinguishable from a failed sensor without direct testing.
4. Faulty control board (approximately 10% of cases)
Less commonly, the main control board’s sensor input circuit develops a fault — typically from a power surge, moisture damage (condensation on the board), or a failed capacitor in the sensor reading circuit. In this case, the sensor and wiring are perfectly functional, but the board cannot read them correctly. This is the most expensive repair and should only be suspected after confirming the sensor and wiring test correctly.
5. Loose or disconnected sensor connector (approximately 10% of cases)
Vibration from the compressor, accidental disconnection during cleaning, or a connector that was never fully seated during manufacturing can cause an intermittent or complete loss of connection. This is the simplest fix — just reseating the connector — but requires accessing the sensor location inside the freezer compartment behind the evaporator cover panel. 156
How to Fix the Whirlpool Refrigerator E1 Error — Step by Step
Follow these steps in order. Steps 1–2 are non-invasive resets. Steps 3–5 involve accessing components inside the freezer.
Step 1: Power cycle the refrigerator
- Unplug the refrigerator from the wall outlet or switch off its circuit breaker.
- Wait 5 full minutes. This allows the control board to fully reset and clear any transient error states.
- Restore power and wait 30 seconds for the display to initialize.
- Check if E1 returns. If the error is gone and doesn’t reappear within 24 hours, it was likely a transient glitch caused by a power fluctuation or momentary connector issue.
If E1 returns immediately or within a few hours, proceed to Step 2.
Step 2: Check for obvious ice buildup (without disassembly)
- Open the freezer. Look at the back wall or the panel covering the evaporator coils. Signs of excessive ice buildup: frost visible along the edges of the rear panel, ice forming on the ceiling of the freezer compartment, reduced airflow from the vents (hold your hand near the vent openings — you should feel cold air being pushed out).
- Listen for the evaporator fan. Open the freezer door and press the door switch to simulate a closed door. You should hear the fan running. If the fan is silent, ice may have seized it, which is a secondary symptom of defrost failure.
- If you see heavy frost or ice, this confirms a defrost system failure that likely triggered E1. Proceed to Step 3 to access the evaporator.
Step 3: Access the evaporator coils and defrost sensor
- Empty the freezer completely and remove all shelves and drawers.
- Remove the rear panel/evaporator cover. This is the interior back wall of the freezer. It’s typically held by 4–8 Phillips-head or Torx screws. Some models also have clips or a wire harness connector attached to the panel (for the fan motor) that must be disconnected before fully removing the panel.
- Inspect the evaporator coils. Healthy coils should have a light coating of frost or be mostly clear. If you see a thick block of ice encasing the coils and surrounding components, defrost has been failing.
- Locate the defrost sensor. It’s a small component (typically a capsule or disc shape, about 1–2 inches in size) clipped or taped directly to one of the evaporator coil tubes, usually near the top or center of the coil assembly. It has a two-wire connector leading to the control board.
Step 4: Test the defrost thermistor with a multimeter
- Disconnect the thermistor’s wiring connector.
- Set your multimeter to resistance (Ω) mode — use the 20kΩ range.
- Measure resistance across the two thermistor terminals.
- Expected readings at different temperatures:
Whirlpool defrost thermistor resistance values: At 32°F (0°C): approximately 16,000–17,000 ohms. At 0°F (-18°C / typical freezer temp): approximately 32,000–35,000 ohms. At room temperature (77°F/25°C): approximately 5,000–6,000 ohms. If reading shows OL (infinite/open) or 0Ω (short), the sensor has failed and must be replaced.
- Interpret your reading:
- If the sensor reads within the expected range for its current temperature — the sensor is good. The problem is likely the wiring harness or control board. Test the wiring (Step 5).
- If the sensor reads OL (open line), 0, or a value wildly outside the expected range — the sensor has failed. Replace it.
Step 5: Inspect wiring and connectors
- With the sensor disconnected, measure continuity of each wire in the harness from the sensor connector to the control board connector. Each wire should show near-zero resistance (good continuity). If either wire shows OL, the wire is broken internally.
- Inspect all visible connectors for corrosion (green or white crusty deposits on pins), moisture, or pins that are pushed back in the housing.
- Check the hinge-area wire run (French door models) — this is the most common failure point for wiring. The wire harness passes through the top hinge and flexes with every door opening.
- If wiring is damaged, repair or replace the harness section. If connectors are corroded, clean with electrical contact cleaner and reconnect.
Step 6: Replace the defrost thermistor
If testing confirms a failed sensor:
- Note the failed sensor’s mounting location and orientation.
- Unclip or remove the old sensor from the evaporator tube. It’s typically held by a metal spring clip or aluminum tape.
- Install the new sensor in the exact same location and orientation. Ensure firm contact with the evaporator tube — if the sensor doesn’t touch the tube, it won’t read coil temperature accurately.
- Connect the wiring harness.
- If there was ice buildup: Before reassembling, manually defrost all ice from the evaporator using a hair dryer on low heat or by leaving the freezer open for 4–6 hours with towels to catch meltwater. Never use sharp objects to chip ice off the coils — this can puncture the sealed refrigerant tubes.
- Reinstall the evaporator cover panel, reconnect the fan if disconnected, and reinstall screws.
- Restore power and monitor for 24 hours. The E1 code should not return. The refrigerator will run a defrost cycle within 8–12 hours automatically — this confirms the new sensor is communicating with the control board.
Common Whirlpool defrost thermistor part numbers:
- WPW10384183 — Fits most Whirlpool French door models (WRF535, WRF555, WRF767 series) and many Whirlpool/Kenmore side-by-side units. Priced $12–25.
- W10225581 — Fits older Whirlpool side-by-side and top-freezer models. Priced $10–20.
- WP2188824 — Fits some Whirlpool/Kenmore top-freezer and side-by-side models. Priced $15–30.
Always verify the correct part number using your model number (found on a label inside the refrigerator compartment, usually on the side wall or ceiling). 157
When to Call a Professional
Contact a certified appliance repair technician if:
- Both the thermistor and wiring test correctly but E1 persists — the control board’s sensor input circuit has likely failed, requiring board-level diagnosis or replacement.
- You are not comfortable working with a multimeter or removing panels inside the freezer. While the repair is straightforward, incorrect reassembly can damage the evaporator fan or puncture refrigerant lines.
- You discover a massive ice block encasing the entire evaporator and suspect additional defrost system components (defrost heater, defrost timer/ADC board) have also failed. Multiple simultaneous failures suggest a systemic issue.
- The refrigerator is not cooling at all in addition to showing E1 — this could indicate the compressor or sealed system is involved, which requires EPA-certified refrigerant handling.
- Your Whirlpool refrigerator is under warranty — Whirlpool provides a 1-year full warranty plus a 5-year sealed system warranty (compressor, condenser, evaporator, and connecting tubing) for most models. Sensor and wiring repairs fall under the 1-year warranty.
Average professional repair costs for E1: Defrost thermistor replacement: $150–$200 total (parts + labor). Wiring harness repair: $120–$180 total. Control board replacement: $250–$400 total. Manual defrost service (ice removal + sensor replacement): $180–$300. Diagnostic service fee: $75–$100, typically credited toward repair. Whirlpool service scheduling: 1-866-698-2538 or whirlpool.com/support. 158
Why E1 Requires Prompt Attention
Unlike some error codes that are informational, E1 on a Whirlpool refrigerator demands attention within 24–48 hours. Here’s why:
When the defrost sensor fails, the control board can no longer determine when to run the defrost heater. Depending on the failure mode, one of two things happens:
- If the board defaults to “no defrost” (most common): Ice accumulates rapidly on the evaporator coils. Within 3–7 days, the coils become completely encased in ice. This ice blocks airflow through the evaporator, causing the freezer to warm to unsafe temperatures (above 0°F) and the refrigerator section to warm above 40°F. Food spoilage risk becomes significant.
- If the board defaults to “continuous defrost” (less common): The defrost heater runs excessively, causing the freezer temperature to rise. The compressor runs continuously trying to compensate, wasting energy and potentially overheating.
Either scenario worsens daily. Early intervention (replacing a $15–25 sensor) prevents a cascading failure that could require manual defrosting (4–6 hours of downtime), emergency food transfer, and potentially more expensive repairs if secondary components overheat.
Food safety threshold: The USDA states that frozen food must be kept at 0°F (-18°C) or below. Refrigerated food must stay below 40°F (4°C). If E1 causes defrost failure, your freezer can breach 0°F within 3–5 days of ice accumulation, depending on how often the door is opened. Monitor temperatures with an independent thermometer if E1 appears. 159
Whirlpool Refrigerator Models Commonly Affected by E1 Error
E1 appears across all Whirlpool refrigerator lines that use electronic adaptive defrost control (ADC). These high-volume models generate the most E1 service requests:
French Door Bottom Freezer models:
- WRF535SMH series (WRF535SWHZ, WRF535SWHB) — 25 cu. ft., Whirlpool’s highest-selling French door model 2020–2026.
- WRF555SDF series (WRF555SDFZ) — 24.7 cu. ft. with external water/ice dispenser.
- WRF767SDH series (WRF767SDHZ) — 27 cu. ft. premium French door with IntelliSense temperature management.
- WRF560SEH series (WRF560SEHZ) — 30-inch wide French door, high sales volume.
Side-by-Side models:
- WRS325SDH series (WRS325SDHZ) — 25 cu. ft. standard side-by-side, extremely popular.
- WRS588FIH series (WRS588FIHZ) — 28 cu. ft. with In-Door-Ice system.
Top Freezer models:
- WRT518SZF series (WRT518SZFM) — 18 cu. ft. budget top-freezer.
- WRT541SZD series (WRT541SZDM) — 21 cu. ft. standard top-freezer.
The diagnostic and repair steps in this guide apply to all Whirlpool refrigerators displaying E1 for defrost sensor fault. Key model-specific differences:
- Evaporator access: French door models require removing the freezer rear panel (4–8 screws). Side-by-side models require removing the freezer section rear panel. Top-freezer models require removing a panel at the back of the freezer compartment.
- Sensor location on evaporator: Typically clipped to the top tube of the evaporator coil assembly on all configurations, but exact position varies. Follow the wire from the sensor connector to locate it.
- Diagnostic mode button combination: Varies by model. Most common: press Door Alarm 3 times within 10 seconds. Some newer models: press Lock + Filter simultaneously for 3 seconds.