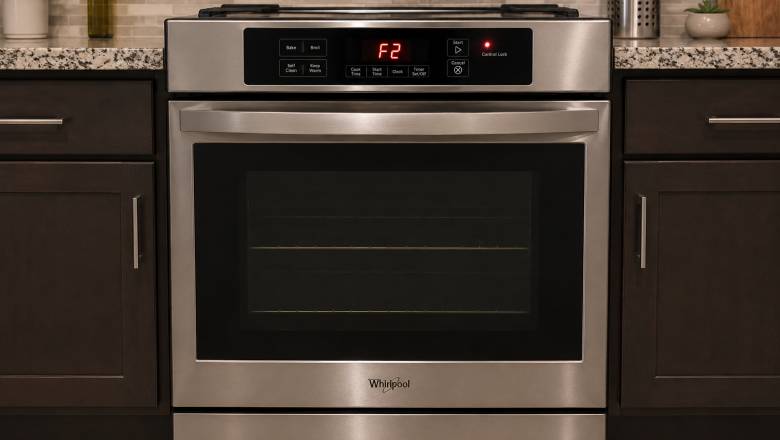
Whirlpool Oven F2 Error Code — Causes and Step-by-Step Fix

The F2 error code on a Whirlpool oven means the electronic oven control (EOC) has detected a temperature sensor circuit fault or an over-temperature condition exceeding the safe limit. According to Whirlpool's official product help documentation, this indicates a problem with the oven temperature sensor, the control board, or the wiring between them. In approximately 45% of cases, the fix is replacing a $10–$15 temperature sensor probe — a 20-minute repair.
The Whirlpool oven F2 error code signals that the electronic oven control (EOC) has detected a fault in the temperature monitoring circuit. This either means the oven temperature sensor is sending an abnormal resistance reading (indicating a shorted or open circuit), or the oven cavity temperature has genuinely exceeded the safe operating limit — a condition most commonly triggered during or immediately after a self-cleaning cycle.
DIY fix success rate: approximately 70% of F2 errors resolved without a technician. Most common part needed: oven temperature sensor (RTD probe), $10–$15 OEM-compatible. Average repair time: 15–25 minutes. Professional repair cost: $150–$400 depending on whether the sensor or control board needs replacement.
Unlike error codes that require complex disassembly, the F2 error on Whirlpool ovens is one of the most straightforward to diagnose because the temperature sensor is easily accessible inside the oven cavity and can be tested with a standard multimeter in under 5 minutes. This guide covers the complete diagnostic path from the simplest checks to control board replacement, with exact resistance specifications and part numbers for your specific model.
What Does the F2 Error Code Mean on a Whirlpool Oven?
The F2 error code on Whirlpool ovens, ranges, and wall ovens indicates that the electronic oven control (EOC) — the main control board that manages heating cycles — has detected an abnormal condition in the oven temperature sensor circuit. According to Whirlpool's official product help page, this means "there may be a problem with the Oven Temperature Sensor, the Control, or the associated wiring."
Specifically, the EOC continuously monitors the resistance of the oven temperature sensor (a Resistance Temperature Detector, or RTD probe). At room temperature (approximately 70°F / 21°C), a properly functioning Whirlpool oven sensor reads approximately 1,080 ohms. As temperature increases, resistance increases proportionally. The EOC uses this predictable resistance curve to calculate the exact oven temperature and regulate the heating elements accordingly.
The F2 code triggers when one of these conditions occurs:
- Open circuit: The EOC reads infinite resistance (OL on a multimeter), meaning the sensor wire is broken or disconnected — the board interprets this as an impossibly high temperature.
- Shorted circuit: The EOC reads near-zero resistance, meaning the sensor wires are touching — interpreted as an extremely low or erratic temperature.
- Genuine over-temperature: The actual oven temperature has exceeded the safe limit (typically 650°F for normal baking mode or 950°F during self-clean), causing the EOC to shut down heating and display F2 as a safety lockout.
Important distinction: On newer Whirlpool models (2015+), you may see two-part codes like F2 E1 or F2 E0. Here, F2 E1 specifically means "oven temperature too high (exceeded preset limit)" while F2 E0 means "keypad or user interface issue." This guide focuses on the standalone F2 and F2 E1 codes related to temperature sensor faults — by far the most common variant.
Common Causes of the Whirlpool Oven F2 Error
Based on appliance repair service data and Whirlpool's technical documentation, here are the causes ranked by probability:
1. Failed oven temperature sensor / RTD probe (approximately 45% of cases)
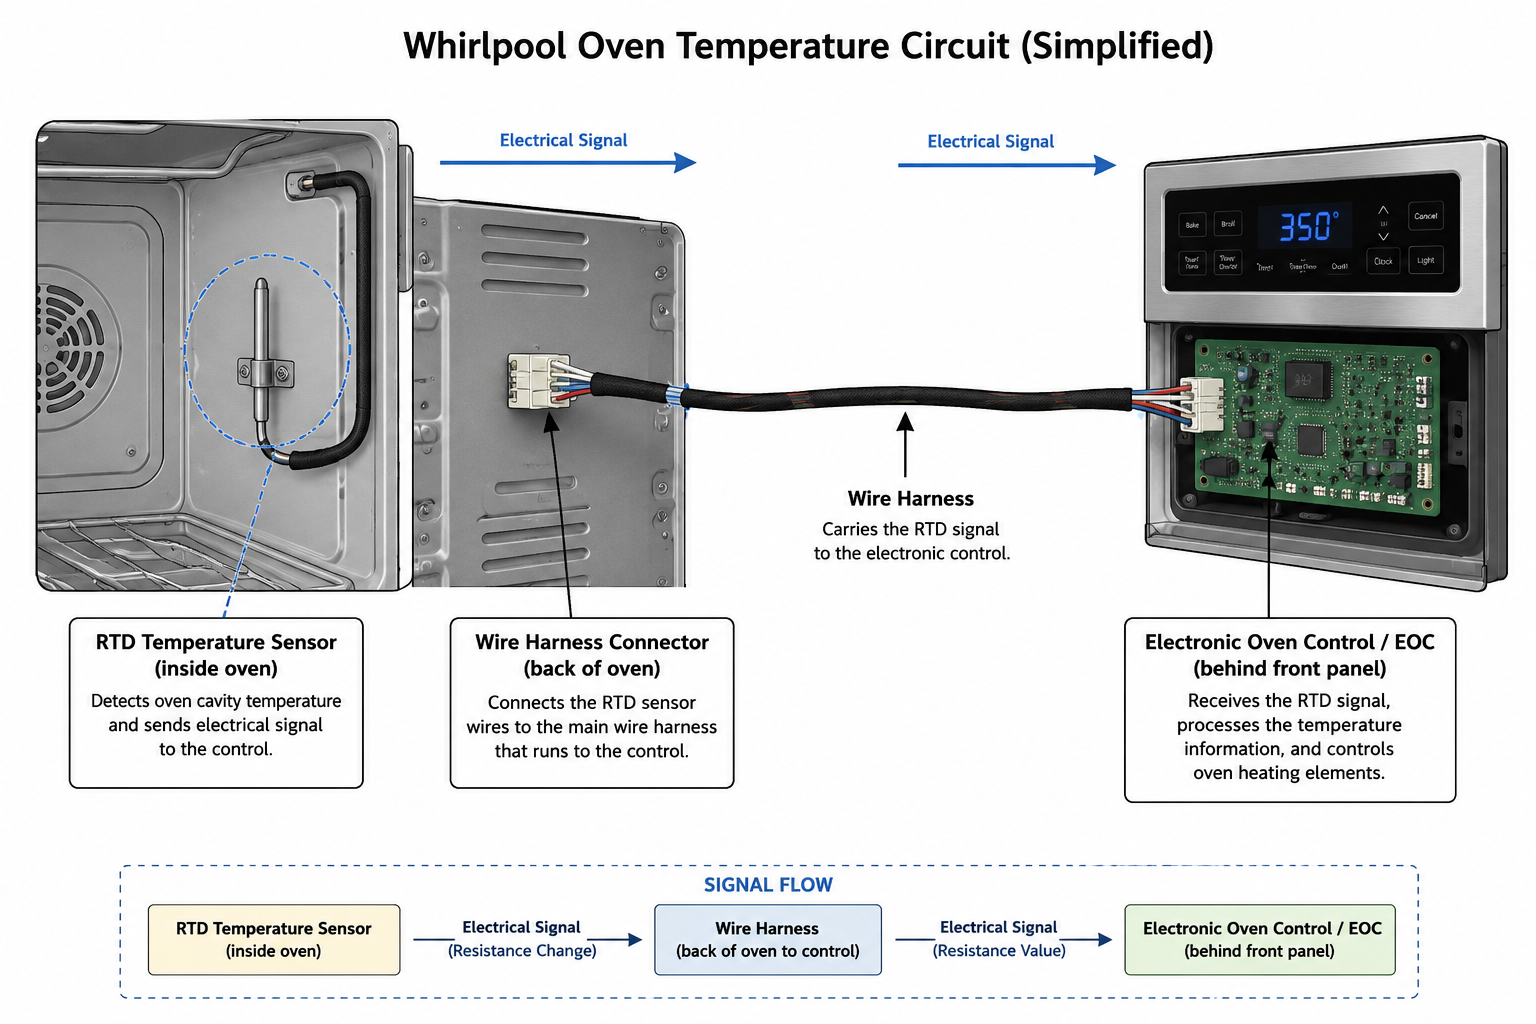
The RTD sensor is a thin metal rod (about 6–8 inches long) mounted on the upper-rear wall inside the oven cavity. Over time, the platinum element inside degrades due to repeated thermal cycling between room temperature and 500°F+. When the element fails, it either reads open circuit (infinite resistance) or develops an intermittent short. The sensor is the cheapest and most accessible component in the system, making it the first thing to test.
2. Self-cleaning cycle damage (approximately 25% of cases)
The self-cleaning cycle pushes oven temperatures to approximately 880–950°F for 2–4 hours. This extreme heat frequently pushes an aging sensor over the edge into failure. It can also cause the sensor's wire insulation to degrade, creating a short against the oven chassis. Many repair technicians report that F2 errors appear during or immediately after a self-clean cycle, even on ovens that were functioning perfectly before.
3. Damaged wiring harness or loose connector (approximately 15% of cases)
The wire harness connecting the sensor (inside the hot oven) to the EOC (behind the front panel) passes through the back of the oven. Over years of thermal expansion and contraction, the connector at the back of the oven can work loose, or the wires themselves can become brittle and crack, creating an intermittent or permanent open circuit that the EOC reads as F2.
4. Faulty electronic oven control / EOC (approximately 12% of cases)
The EOC (control board) can develop failed components — particularly the relay contacts that control the bake and broil elements. When a relay welds shut (the contacts fuse together), the heating element stays on continuously regardless of the sensor reading, causing a genuine over-temperature condition. The board can also develop faulty input circuitry that misinterprets a normal sensor reading as abnormal.
5. Shorted heating element (approximately 3% of cases)
Rarely, a bake or broil element can develop a short to the oven chassis, creating erratic heating that triggers the over-temperature safety. This is uncommon but should be checked if the sensor and wiring test normal and the oven was visibly overheating (glowing red element that won't turn off).
Key diagnostic fact: The oven temperature sensor (cause #1) costs $10–$15 and takes 20 minutes to replace. The electronic oven control board (cause #4) costs $150–$470 and takes 30–45 minutes. Always test the sensor first before assuming the board is faulty — approximately 80% of F2 errors originate in the sensor or wiring, not the control board.
How to Fix the Whirlpool Oven F2 Error — Step by Step
Follow these steps in sequence. Each builds on the previous one, moving from the simplest no-cost checks to component replacement. Most users resolve the F2 error within Steps 1–3.
Step 1: Power cycle the oven (rule out a transient glitch)
Before any repair work, rule out a temporary electronic glitch:
- Turn off the circuit breaker supplying power to the oven (usually a 40A or 50A double-pole breaker labeled "Range" or "Oven" in your electrical panel).
- Wait a full 60 seconds. This allows the EOC capacitors to fully discharge and memory to clear.
- Restore power and start a normal bake cycle at 350°F.
- Monitor for 5 minutes. If F2 does not return, the issue was a transient spike (common after power outages or self-clean cycles). If F2 returns, proceed to Step 2.
Step 2: Inspect the sensor visually (inside the oven)
The temperature sensor is visible without disassembly:
- Ensure the oven is OFF and cool. If F2 appeared during a self-clean cycle, wait at least 2 hours for the oven to cool below 100°F before opening.
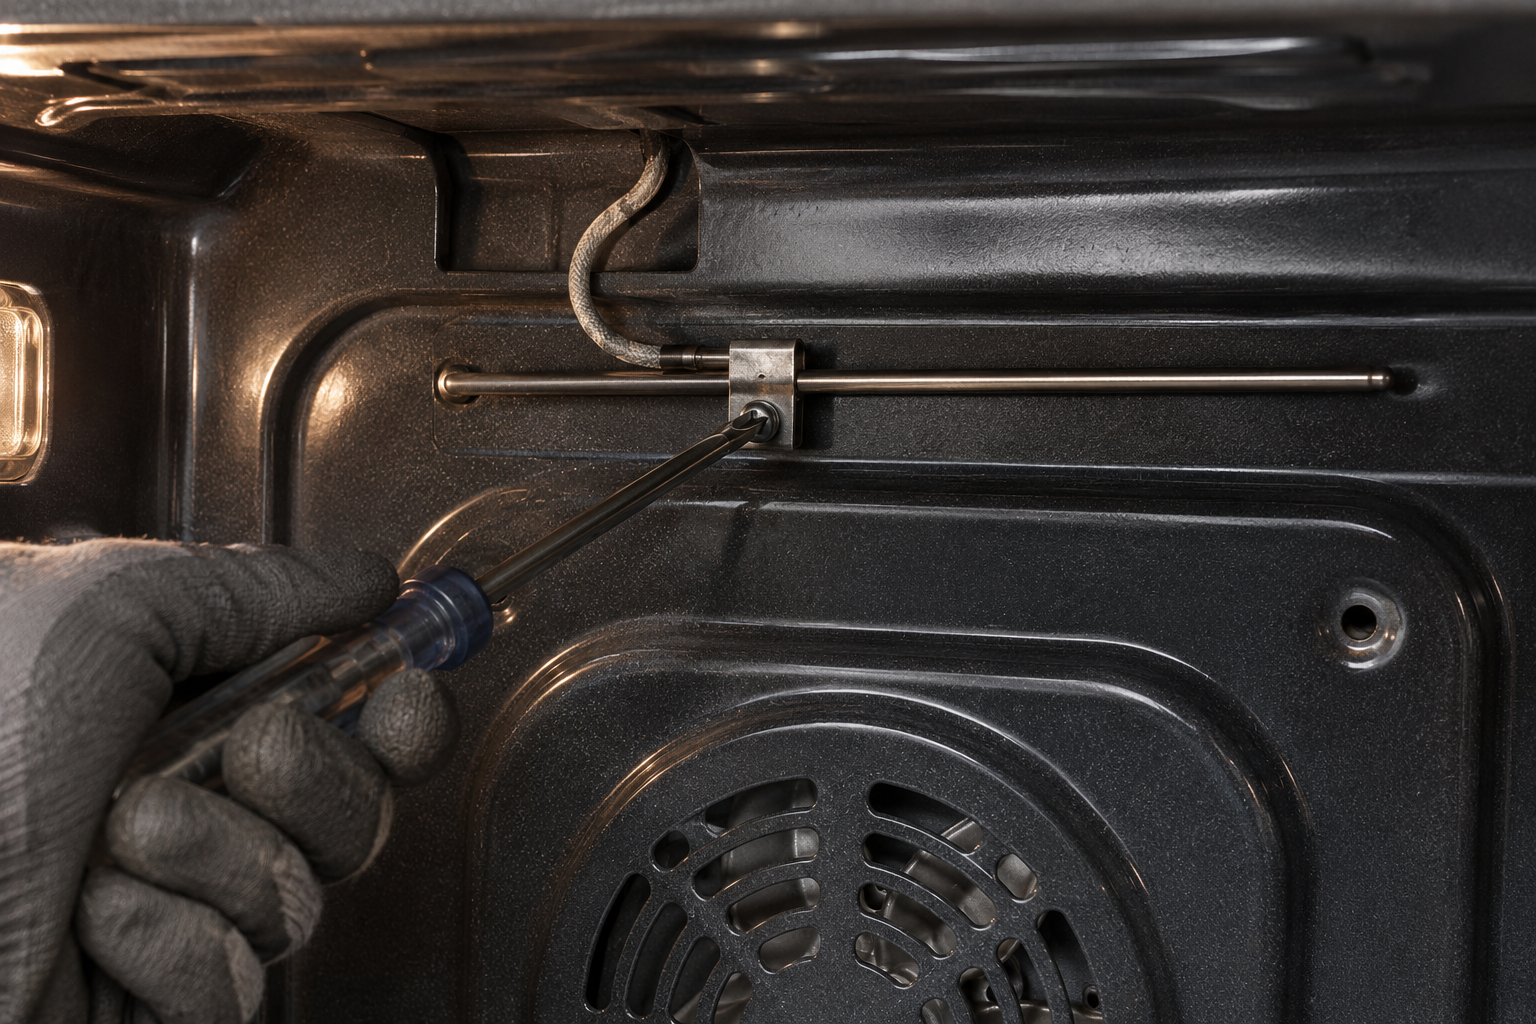
- Open the oven door and look at the upper-rear wall of the oven cavity. You will see a thin metal rod (approximately 6–8 inches long) protruding horizontally from the back wall, held by a single mounting bracket and one or two screws.
- Inspect for visible damage: blistered or cracked insulation on the wires near the back wall, a bent or melted probe tip, or any discoloration suggesting overheating damage.
- Gently wiggle the sensor. It should be firmly mounted and not loose in its bracket.
If the sensor is visibly damaged (melted, discolored, cracked wires), it needs replacement — skip to Step 4. If it looks normal, proceed to Step 3 for the definitive electrical test.
Step 3: Test the sensor resistance with a multimeter
This is the definitive diagnostic step. You need a standard digital multimeter ($15–$30 at any hardware store).
- Disconnect power — Turn off the circuit breaker. Confirm by pressing oven buttons (display should be dead).
- Access the sensor connector — Pull the oven away from the wall. On the back of the oven, locate where the sensor wires exit through the rear panel. You will see a 2-pin plug connector. Disconnect it.
- Set your multimeter to ohms (Ω) — Select the 2,000Ω or 20kΩ range.
- Measure the sensor resistance — Touch one probe to each pin of the sensor connector (the side that goes INTO the oven, not toward the control board). At room temperature (approximately 70°F / 21°C), a healthy Whirlpool oven sensor reads approximately 1,080 ohms (±20 ohms).
- Interpret the reading:
- 1,050–1,100 ohms: Sensor is healthy. The problem is likely in the wiring harness or the EOC. Proceed to Step 5.
- OL (Open Line / infinite resistance): Sensor has an open circuit — the internal element is broken. Replace the sensor (Step 4).
- 0 ohms or very low (under 500 ohms): Sensor is shorted. Replace the sensor (Step 4).
- Fluctuating wildly: Intermittent fault, sensor failing. Replace the sensor (Step 4).
Step 4: Replace the oven temperature sensor
If the sensor tested faulty, replacement is straightforward:
- Order the correct part — The most common Whirlpool oven sensor part number is WP8053344 (also cross-referenced as 8053344, 3196966, 4337170). This part is compatible across most Whirlpool, KitchenAid, Kenmore, Maytag, and Roper ovens that use the same connector type. Priced between $10–$20 from Amazon, RepairClinic, or Whirlpool Parts Direct. Verify your model's specific part number on the nameplate inside the oven door frame.
- Remove the old sensor — From inside the oven, remove the 1–2 mounting screws holding the sensor bracket to the rear wall (typically a 1/4" hex head screw). Gently pull the sensor probe forward and out of the oven cavity. Then from the back of the oven, disconnect the wire connector and pull the sensor wire through the back panel.
- Install the new sensor — Feed the new sensor's wire through the rear panel hole from inside the oven. Connect the 2-pin plug at the back. Mount the sensor probe to the rear wall bracket with the mounting screw(s).
- Test — Restore power, start a bake cycle at 350°F, and monitor for 10 minutes. The oven should heat normally without F2 appearing.
Step 5: Check the wiring harness
If the sensor tested good (1,050–1,100 ohms) but F2 persists:
- With the sensor connector still disconnected at the back, set your multimeter to ohms.
- Measure resistance across the 2 pins of the wiring harness connector (the side going toward the control board, NOT the sensor side).
- A healthy harness should read very low resistance (under 2 ohms) on each wire when tested from one end to the other — essentially zero resistance from connector at the back to the EOC board pins at the front.
- If you read OL on either wire, the harness has a break. Trace the wire routing and look for a damaged section — often near the rear panel where heat exposure is highest.
- Repair a broken wire with a high-temperature crimp connector rated for 500°F+, or replace the entire harness assembly if available for your model.
Step 6: Replace the electronic oven control (EOC) — last resort
If the sensor reads correct resistance AND the wiring is intact, the EOC itself is likely faulty:
- Confirm welded relay contacts — If the oven was actively overheating (element glowing red and not turning off) before the F2 appeared, a relay contact on the board has likely welded shut. This is a definitive sign the EOC needs replacement.
- Order the EOC — Part numbers vary by model. Common ones include W11122555, W10348709, W10556710, and W11126814. Pricing ranges from $150 to $470 depending on your specific model. Check the old board's part number printed on its label before ordering.
- Installation — The EOC is located behind the oven's front control panel. Remove the screws holding the back cover of the control panel area (usually 2–4 Phillips screws), slide out the old board, transfer the wire connectors to the new board (photograph them first), and reassemble. This takes 30–45 minutes.
Note: Given the cost of the EOC ($150–$470), many people opt for professional diagnosis at this stage to confirm the board is truly at fault before committing to the purchase. A qualified technician can test relay continuity and board voltages to verify definitively.
F2 Error During Self-Cleaning: Special Considerations
The self-cleaning cycle is the single most common trigger for the F2 error on Whirlpool ovens. Understanding why helps prevent expensive damage:
Why self-clean triggers F2: During a self-clean cycle, oven temperatures reach 880–950°F (471–510°C) for 2–4 hours. This is far beyond normal cooking temperatures (350–500°F) and places extreme thermal stress on the temperature sensor, its wiring insulation, and even the control board's relay contacts. A sensor that was marginally functional at cooking temperatures may fail completely when pushed to self-clean extremes.
What to do if F2 appears during self-clean:
- Do NOT turn off the circuit breaker immediately. The cooling fans need electricity to run and bring the oven cavity temperature down safely. Turning off power while the oven is at 900°F+ risks heat damage to surrounding cabinetry and other internal components.
- Press Cancel/Off on the control panel. The oven will begin cooling with the door locked. Wait 30–90 minutes for the temperature to drop below 550°F, at which point the door lock should release.
- If the control panel is completely unresponsive (no buttons work), leave the oven plugged in with the door closed and wait 2–3 hours for natural cooling. The door lock will release once the internal temperature drops to safe levels.
- Once cool, turn off the breaker and proceed with sensor testing (Step 3 above).
Industry recommendation: Many appliance repair professionals advise against using the self-clean cycle on ovens older than 5 years. The risk of triggering a sensor or control board failure during self-clean far outweighs the convenience. Instead, use a commercial oven cleaner spray and manual wiping for routine cleaning.
If the door is stuck locked after F2: This is normal. The door lock mechanism is temperature-activated and will not release until the oven has cooled below its safety threshold (typically 550°F). If the door remains locked after the oven is completely cool (room temperature), the door lock motor or switch may have failed — a separate issue from the F2 error itself. In that case, disconnecting power for 5 minutes and restoring it often resets the lock mechanism.
When to Call a Professional
Contact a certified appliance repair technician if:
- The sensor tested normal (1,050–1,100 ohms), wiring is intact, but F2 keeps returning — this strongly suggests a control board fault that requires professional-level relay testing and possible EOC replacement.
- The oven was actively overheating (heating element glowing red and not shutting off) — this indicates welded relay contacts on the EOC, which is a potential fire hazard and should be addressed urgently.
- You are uncomfortable working with 240V electrical circuits. Unlike dishwashers and washers that run on 120V, electric ovens and ranges operate on 240V, which presents a higher safety risk during diagnosis.
- Your oven is under warranty — Whirlpool provides a standard 1-year parts and labor warranty on all cooking appliances. If your oven was purchased within the last 12 months, contact Whirlpool directly for free warranty service.
- The F2 error appeared alongside a burning smell or visible smoke from behind the control panel — this may indicate a shorted component on the control board itself.
Average professional repair cost for an F2 error: $150–$400 total (diagnosis + parts + labor). If only the sensor needs replacement: $80–$150 total (parts are cheap but labor minimum charges apply). If the EOC needs replacement: $300–$600 total. Typical diagnostic fee: $75–$125, often credited if you proceed with repair.
For warranty service or to find an authorized Whirlpool service provider, contact Whirlpool at 1-866-698-2538 (US) or visit whirlpool.com/repair/service.html to schedule online.
Whirlpool Oven Models Commonly Affected
The F2 error code appears across all Whirlpool oven product lines — freestanding ranges, slide-in ranges, wall ovens, and double ovens — because they all use the same RTD sensor design. The following series are particularly common in F2 reports due to their market prevalence:
Freestanding Ranges:
- WFE505W series (WFE505W0JS, WFE505W0JZ) — 5.3 cu. ft. electric range with self-clean, one of Whirlpool's best sellers.
- WFE515S series (WFE515S0JS, WFE515S0JT) — Entry-level electric range with ceramic cooktop.
- WFE975H series (WFE975H0HZ) — Smart range with touchscreen and Scan-to-Cook.
- WFG320M series (WFG320M0BS) — Budget gas range (gas models use the same electric oven sensor).
Wall Ovens:
- WOS51EC series (WOS51EC0HS, WOS51EC7AS) — 5.0 cu. ft. single wall oven with AccuBake.
- WOD51EC series (WOD51EC0HS) — Double wall oven with upper and lower cavities (each has its own sensor).
- WOS92EC series (WOS92EC0AH) — Smart wall oven with remote preheat.
Slide-In Ranges:
- WEE750H series (WEE750H0HZ) — 6.4 cu. ft. slide-in electric range with True Convection.
- WEG750H series (WEG750H0HZ) — Slide-in gas range with electric oven.
The diagnostic and repair steps in this guide apply to all Whirlpool ovens displaying F2, F2 E1, or the older equivalent codes. The only variation is the specific sensor part number (WP8053344 is the most universal, but verify on your model's nameplate) and the EOC part number (varies significantly by model). The sensor mounting location and connector type are consistent across all lines.
Note: Whirlpool Corporation also manufactures KitchenAid, Maytag, Amana, and Jenn-Air cooking appliances. Many of these brands use identical internal components and display similar F-codes. If you have a KitchenAid or Maytag oven showing F2, this guide applies equally — the sensor, wiring, and EOC architecture are the same.
Preventing Future F2 Errors
Once you have resolved the immediate F2 error, take these preventive measures to reduce the risk of recurrence:
- Avoid using the self-cleaning cycle on ovens older than 5 years. The extreme heat (880–950°F) is the primary accelerator of sensor and control board failures. Use a commercial oven cleaner and manual wiping instead — it takes more effort but preserves the electronics.
- If you must self-clean, run a shorter cycle. Many Whirlpool ovens offer a 2-hour "light clean" option alongside the standard 3–4 hour cycle. The shorter duration reduces peak thermal stress on components.
- Inspect the sensor visually once per year. When you clean the oven interior, take a moment to look at the sensor probe on the rear wall. Check for discoloration, blistered wire insulation, or a loose mounting bracket. Catching degradation early prevents a mid-cooking failure.
- Keep the sensor clean. Food splatter and grease that accumulate on the sensor probe can affect its accuracy over time and cause intermittent readings. Wipe the sensor gently with a damp cloth during routine oven cleaning.
- Ensure proper ventilation around the oven. Built-in wall ovens and ranges pushed flush against rear walls with insufficient clearance can trap heat around the wiring and connectors. Maintain the manufacturer-specified clearances (check your installation manual, typically 0–1 inch rear gap for freestanding ranges).
- Consider a surge protector. Voltage spikes from storms or grid fluctuations can damage the EOC. A dedicated appliance surge protector ($30–$60) on the oven circuit provides protection against electrical surges that can cause false F2 triggers or permanent board damage.
Sensor lifespan under normal use (no self-clean abuse): approximately 8–12 years. Sensor lifespan with regular self-clean usage: approximately 4–7 years. Proactive replacement of a $10–$15 sensor every 7–8 years is significantly cheaper than an emergency $400 control board replacement triggered by cascading self-clean damage.